
Your car is fast, but it keeps flying off at the jump. Sound familiar? Brakes are the fix. This guide explains how Mini 4WD brakes work, which parts to buy, and how to set them up, all in plain words.
1. What a brake actually is
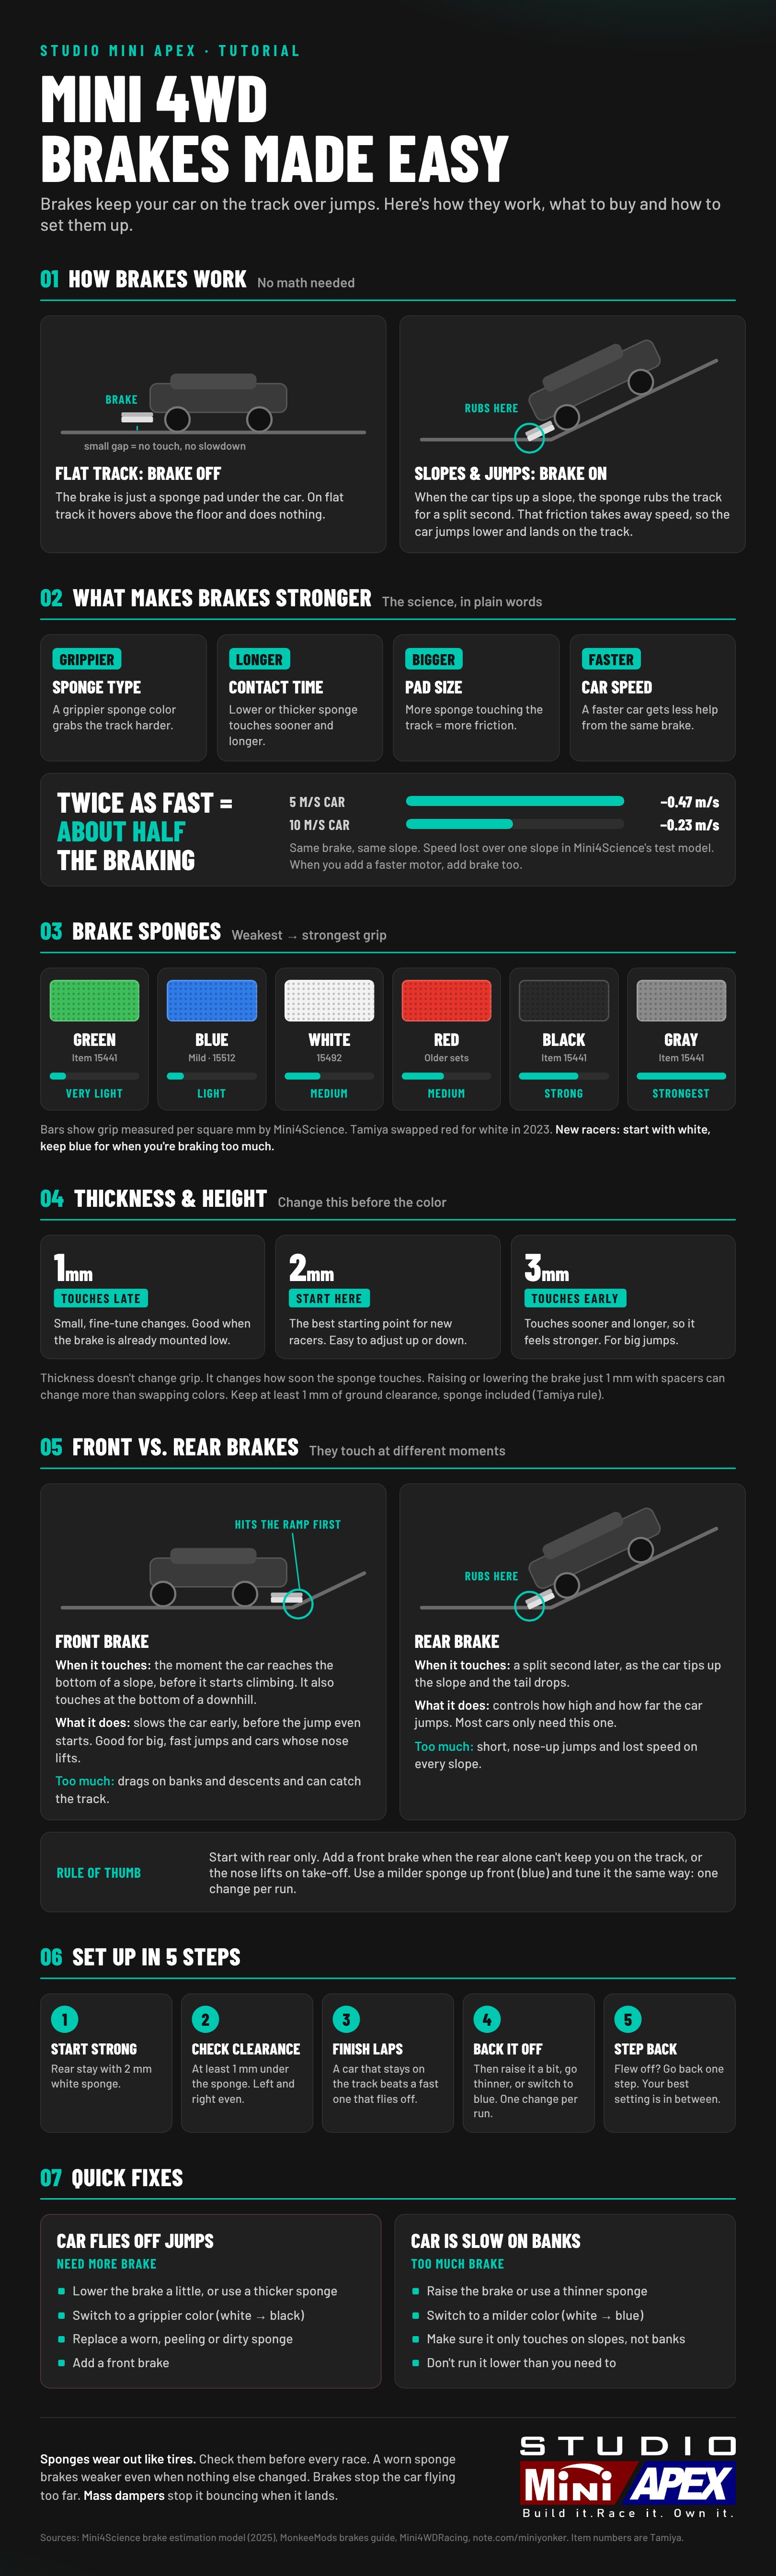
A Mini 4WD brake isn’t like a bike brake. You don’t press anything. It’s a strip of sponge stuck on a plate (called a brake stay) under the back or front of your car.
- On flat track, the sponge hovers just above the floor and does nothing.
- On slopes and jumps, the car tips up, the sponge rubs the track for a split second, and that rubbing takes away some speed.
Less speed at the top of the jump means a lower, shorter jump, so your car lands back on the track instead of flying out.
2. The science, without the math
Mini4Science built a physics model of how much speed a brake takes away on a slope. Here’s what it means in plain words:
- Grippier sponge = more slowdown. Each sponge color has a different grip.
- Longer contact = more slowdown. The longer the sponge rubs, the more speed it takes. Height and thickness decide this.
- Bigger pad = more slowdown. More sponge touching the track means more friction.
- Faster car = less help from the brake. This is the big one. In their test, a car going 5 m/s lost about 0.47 m/s on one slope. At 10 m/s the same brake took only about 0.23 m/s. Twice the speed, about half the braking.
So when you upgrade to a faster motor or gears, plan on adding more brake too.
3. Which sponge to buy
From weakest to strongest grip (measured by Mini4Science):
- Green: very light (Tamiya 15441, 3-type set)
- Blue: light, sold as “mild” (Tamiya 15512)
- White: medium, Tamiya’s standard sponge (15492). It replaced red in 2023.
- Red: medium, found in older sets
- Black: strong (15441)
- Gray: strongest (15441)
New racers: get a white set and a blue set, plus an FRP Rear Brake Stay (15518). That covers almost every track.
4. Thickness and height matter most
Sponges come in 1 mm, 2 mm and 3 mm. Thickness doesn’t change grip. It changes how soon the sponge touches the track.
- 1 mm: touches late. Use it for small adjustments.
- 2 mm: start here.
- 3 mm: touches early and longer, so it feels stronger.
You can also raise or lower the whole brake with spacers or washers under the screws. A 1 mm height change can do more than switching colors, so adjust height first, then color.
Rule: keep at least 1 mm of ground clearance, sponge included. Sponges wear, so check this before every race.
5. Front vs. rear brakes
Front and rear brakes touch the track at different moments, so they do different jobs.
Front brake (under the front of the car, ahead of the front wheels)
- When it touches: the moment the car reaches the bottom of a slope, before it starts climbing. The ramp rises in front of the car and the front sponge hits it first. It also touches at the bottom of a downhill.
- What it does: slows the car early, before the jump even starts. Good for big, fast jumps and for cars whose nose lifts on take-off.
- Too much: it drags on banks and descents, catches the track and costs speed.
Rear brake (behind the rear wheels)
- When it touches: a split second later, as the car tips up the slope and the tail drops onto the track.
- What it does: controls how high and how far the car jumps. Most cars only need this one.
- Too much: short, nose-up jumps and lost speed on every slope.
Rule of thumb: start with a rear brake only. Add a front brake when the rear alone can’t keep you on the track, or the nose lifts on take-off. Use a milder sponge up front (blue) and tune it the same way, one change per run.
6. Set up your brakes in 5 steps
- Start strong. Rear brake stay with a 2 mm white sponge.
- Check clearance. At least 1 mm under the sponge, even on both sides.
- Finish laps first. A car that stays on the track always beats a faster car that flies off.
- Back it off slowly. Raise the brake a little, go to a thinner sponge, or switch white to blue. Change only one thing per run.
- Step back if it flies off. Go back to your last setting. The best setup is somewhere between the two.
7. Quick fixes
Car flies off at jumps (need more brake):
- Lower the brake a little, or use a thicker sponge
- Switch to a grippier color (white to black)
- Replace a worn, peeling or dirty sponge
- Add a front brake
Car is slow on banks or slopes (too much brake):
- Raise the brake or use a thinner sponge
- Switch to a milder color (white to blue)
- Check it only touches on slopes, not on the banked corners
- Don’t run it lower than you need. Lowest isn’t fastest.
8. Brakes vs. mass dampers
They do different jobs. Brakes stop your car flying too far. Mass dampers stop it bouncing when it lands. Most race cars use both. See our Brakes & Dampers guide for damper weights.
Common mistakes
- Too much brake “to be safe.” Extra brake slows you on every slope, not just the risky one.
- Changing three things at once. Then you won’t know what worked.
- Forgetting sponges wear out. Treat them like tires. A worn sponge brakes weaker.
- Heating or melting sponges. Not allowed in Tamiya races. Cutting sponge to fit is allowed.
Come try it on our track! Bring your car to Studio Mini Apex on Sunday and test your brake setup on real jumps.
Sources: Mini4Science brake estimation model, MonkeeMods, Mini4WDRacing, note.com/miniyonker.